Wednesday 30 August 2017

Cable Holder - Part 2

A few days passed before Damian had a chance to look at Retro Rock-It again...  This time, his you-beaut LED work light would come into effect!!


Removing the tape, Damian discovered that the black, sticky stuff just wasn't sticky enough...  Alternatively, he didn't use enough!!


After cleaning off the dried dregs, and applying the remainder of the tube (about three times the amount initially used), Damian re-stuck it down...


Meanwhile, inside Retro Rock-It, the passenger floor was still coated in wires...  Even more now that Damian had fed through most of the wires that were previously dangling in the driver's floor!!


So, another 24 hours of drying time is needed...  Nothing's ever easy!!

Sunday 27 August 2017

Cable Holder - Part 1

Having fed the cables from the roof down through the firewall and into the cabin, Damian figured it was time to work out how to stop the cables from flapping around up the A pillar...


In Booger Mobile, there was a convenient set of screws, and the granny visor, leading to a guttered roof, which assisted greatly...  Retro Rock-It has none of these...


So, some split conduit attached with some black, sticky stuff might just do the trick!!


24 hours drying time, then everyone will see if the theory has worked!!

Sunday 20 August 2017

Wiring, Housekeeping and LED Lights

Sunday... two months until esCarpade 2017, and another working bee with Adam coming around...

First up, Booger Mobile vacated the shed to allow Retro Rock-It to be worked on...


Damian even tidied the floor - you can actually *see* the floor in parts!!


Test of the newly painted rooftop pod...  fits nicely...


And from the back...


First up, Damian and Adam emptied Retro Rock-It's boot, which was chock full of goodies (in the form of spare parts, the other spare wheel etc).


Adam demonstrating proper vacuuming technique...


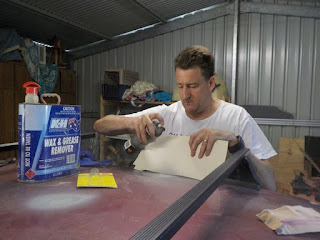
Meanwhile, the holes in the roof where the previous lights were mounted needed filling...  First up, sand back to bare metal...


And the ones on the passenger side, too...  The one with the rubber grommet will remain for some wiring to come through at a later stage.


Meanwhile, Adam finished the vacuuming - how big is this boot???!?!?!?!?!  Must be three times the size of Booger mobile's!!


Patched and sanded back...


Little bit of spray putty/sealer/undercoat...


Next up, a hole in the firewall to feed some wires through for the lights on the roof...


And with a nice rubber grommet installed!!


Wrapping some more of the wires so that they feed into the new grommet in a wrapped state...


Adam poking wires through the firewall...


And Damian on the inside pulling them through...


One small bracket to hold the wires in place...  It's black, believe it or not!!


A second hole, also with a rubber grommet...


Booger Mobile acquired one extra horsepower...


A snappy tidy-up of the front windscreen surround (with some matt black paint)...


And the wires are secure...


Adam working on a very dusty roof installing one of the amber LED strobe lights...


Damian on drill-duty for the mounts...


And one set of amber LED strobes installed...  with wiring nearby...  It's almost like they will work at some point!!


Retro Rock-It needs a good dust, or perhaps a wash!!


Up on the ramps to check out the underside...  There is a chock behind the rear wheels, even though it's not quite in the picture... Safety first!!


Adam having a look-see, with Merlin lining him up for an unwanted tongue in the ear!!


Adam pointed out some mud on the edge of the transmission - perhaps some further washing is in order at some point!!


Damian's turn - both to have a look under the car, and to be licked by Merlin!!


The front brake rotors look fine!!


Retro Rock-It getting ready to go back to the carport...  The light isn't actually on, it's just a reflection from the afternoon sun!!


And Booger Mobile back in the shed for safe-keeping...


Another weekend has come and gone, and the esCarpade just keeps on getting closer...  Will the boys be finished in time?  Hopefully...

Stay tuned as the esCarpade is rapidly approaching…

Saturday 19 August 2017

Rooftop Pod Completed

The rooftop pod looks a whole lot better without the green around Giggle's head... adding the exclamation marks in red makes them stand out a bit more... 


Back on with the amber rotator...  Damian feels safer already!!


Booger Mobile was still holding onto some of the lights that Damian wants for Retro Rock-It, so that was the next task...  Rear windows...


Done!!


Strobes on the front grille...


Done!!


One set of green LED strobes...


Joining the amber LED strobes already removed...


The rest of the day was spent putting Booger Mobile back together, ensuring that the wiring that was removed was all gone, and that remaining wiring was reconnected to power and earth as required... 

To read more about it, head over to the Booger Mobile blog - http://boogermobile.blogspot.com

Wednesday 16 August 2017

Roof Rack Installed and Pod Painted

Wednesday, the Brisbane Ekka Holiday, meant an extra day for Damian to get some work done on Retro Rock-It...


First task - add the finishing touches to the back of the rooftop pod...  First add some black in behind the mouth...


Then touch up some of the minor runs/scratches...


After a few days to think about it, Damian decided that he really didn't like the green background around Giggle's head on the front of the rooftop pod...


First step - black it out...


While the pod was drying, Damian grabbed his newly purchased Rhino Rack roof rack - 75kg load rating.  This purchase was courtesy of the wonderful donation by Mrs Denise Gadsden, who has been a supporter of Booger Mobile for a number of years, and has now contributed to getting Retro Rock-It to the start line in 2017...


After reading, rereading, measuring, cutting and realising that the instructions for the standard bar do not work for the slightly longer bar that Damian bought (for reasons that will become apparent as the build continues), Damian finally started to make some progress on the fitting...


And through the magic of the interwebs, the front one was installed.


This is how the attachment works...


Next up, measure and mark the position of the rear roof rack...


Tada!!  All done!!


One pair of roof racks, fitted with much toing and froing to re-measure everything around a thousand times... but Damian got there in the end!!


End caps and funky covers complete the deal!!


That should be good to attach a rooftop pod to!!  Speaking of which, Damian headed back to the shed to check out if the paint was dry...


Looking good!!  Noticing the line around the Giggle face was still visible, Damian gave it a light sand...


Then applied another coat of paint.


Much better once it had dried for a while!!


And the touch-ups on the back are much less noticeable now...


So a tedious and time-consuming (but very necessary) set of work has come to a close...  Next cab off the rank is to work out any further pod theming required, do a test fit onto the roof rack (which might require new rubber locking mounts to be cut), and keep making progress on the wiring...

Stay tuned!!