This blog post is the combination of a snappy bit of painting on Wednesday night (the first three pictures), followed by the work on Saturday (the rest of the blog post).
Because the yellow outline needed plenty of time to dry, then a second coat, Damian waited a few days then retraced the outline...
Let's all chant together... RETRO!!
ROCK-IT!!
RETRO ROCK-IT!!
Saturday morning rolled around, and Retro Rock-It was booked in for a fresh new set of Yokohama Geolandar All Terrain tyres...
A quick pre-tyre-change measure showed the following:
Driver's Side - Front - 20.5cm. Rear - 21.5cm.
Passenger Side - Front - 20.5cm. Rear - 21cm.
What does this mean? Let's measure with a biotin bucket... here's the front.
And now the rear...
Off to the K-Mart Tyre and Auto Service at Burpengary...
Straight onto the hoist...
Looking the goods...
Damian brought the old tyres home with him, as even though they weren't particularly fabulous for this year's esCarpade, they were still relatively new... Here's a tyre height comparison... The old tyres were 205/65/15, and the new ones 205/70/15.
In real terms, this means the new tyres are 2cm higher overall, which should give a 1cm increase in clearance (as the other 1cm in height is at the top of the tyre, of course!
The shoulders on the new tyres are more chunky, too... however the rest of the tyre for an all-terrain is not as aggressive as it could have been...
Damian selected these tyres for their all-round performance (both on and off-road), and their superior handling in the wet.
But what does that all mean? After the tyres were fitted, the measurements were as follows:
Driver's Side - Front - 22cm. Rear - 23cm.
Passenger Side - Front - 22cm. Rear - 23cm.
A 1.5cm gain all round (with an extra 0.5cm on the passenger rear, that could be down to measuring error by Damian).
What does the bucket test say? Clearly more at the front...
And more at the rear also...
The tyres do fill the guards a little more, though... And eagle-eyed blog readers would see that there are now some white patches (and lead weights) that aren't red due to the balancing process requiring lead in different places... Damian will paint these in due course.
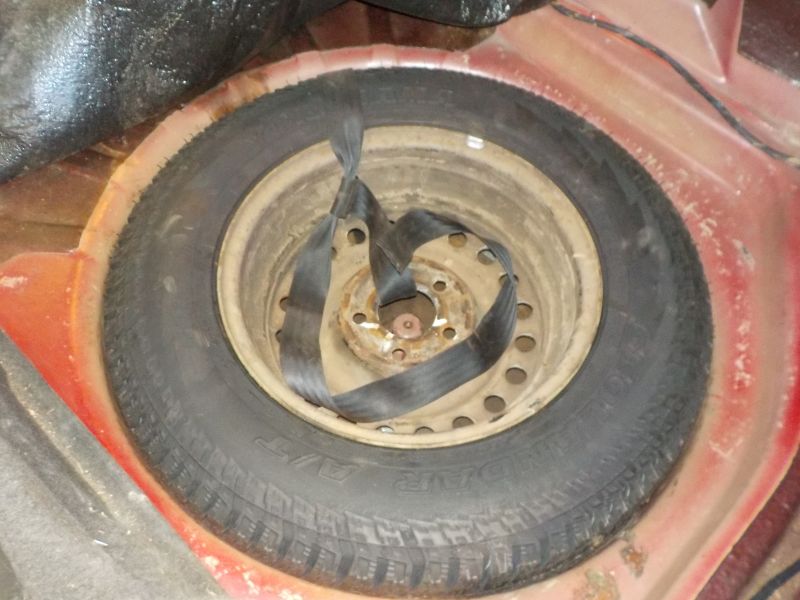
One amusing anecdote... At the tyre place, the mechanic threw the spare into the wheel well - it was a tight fit!! He and Damian laughed that it would be interesting to get out - they were right!! It took quite a bit of effort to remove it!!
Whew!! Thankfully you can't hear the words Damian muttered... After some fine-tuning of the wheel well with a hammer it was a lot better, but still a pretty damn tight fit...
Damian had a brain-wave... Perhaps an old seat belt through the tyre would act as a removal tool?
Off with the end...
And into the wheel well, hooked through the centre of the wheel... What do you know? It worked!!
Onto stickerising… There can never be enough stickers on a bash car (as Bill pointed out in the comments of the last blog post), so how to make these fit?
How about some flames and a cut-out to go around the indicators?
Yep, that's where it's going to go...
Voila!!
And one for the other side...
Again, that's the spot Damian's talking about...
Nice... fits like a big fitting thing!!
The rooftop pod is still a little colourless... Damian attempted to put a sticker on there, but it wasn't particularly secure... Off it came again - Damian might need to add some paint by hand!!
Here's a good suggestion for a Giggle sticker... unfortunately that's on the boot lid, so no one would see it!!
Probably a bit small for this place.. might use a larger sticker instead...
Like this one!
Here's another lonely looking spot...
And this one is a bit lonely too...
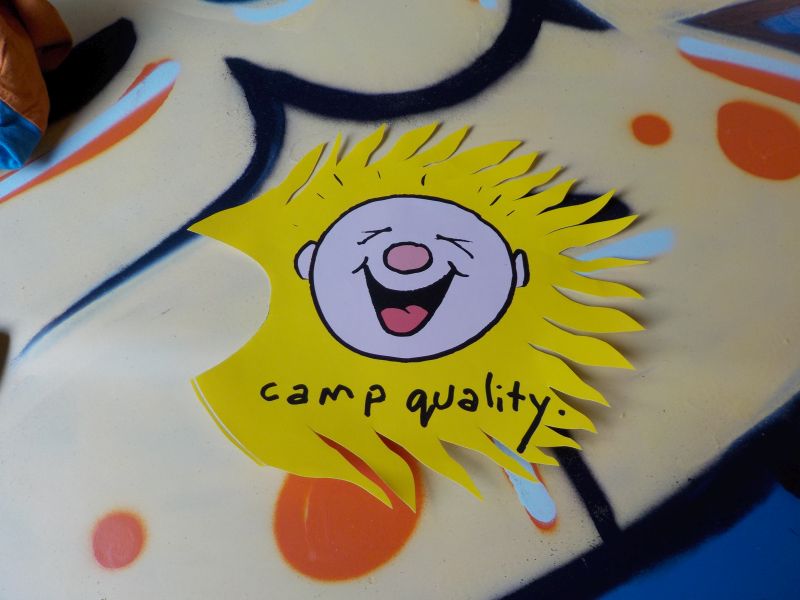
Holy flaming Camp Quality, Batman!!
And remember Giggle from the bootlid shot? He found a home here... Nice maroon helmet!!
Looking the goods now!!
So that was another exciting instalment of Damian stickerising Retro Rock-It... The esCarpade is now less than FOUR WEEKS away, and apart from some minor theming, Retro Rock-It is ready to pack and head off...
Stay tuned for some final posts prior to esCarpade as the finishing touches are applied, and then of course, every day of esCarpade will be blog time!